Understanding Workflows & Approvals
Understanding approvals
Approvals sit at the Division level and Divisions are designed to be flexible, but are really the natural groupings of people in your organisation. If you are a typical business with Marketing, Sales, HR then the Divisions would be perfect for this. If you are a retail chain then perhaps each Division will be a store with the respective users assigned accordingly. So first off, create your Divisions and assign the users. Then set your “Head of Division”. This is useful as it’s a variable in Zahara and can allow you to create the perfect approval process in one Division and then copy it over to other Divisions.
Typical Purchase Approval
A typical purchase approval is usually layered on the values. As the value of the order increases, more people are involved in the approval. Here is a typical approval process that we use in our demonstrations:
| Step 1 | Head of Division | all |
| Step 2 | Business Unit Head | > £1000 |
| Step 3 | CFO | > £10000 |
| Step 4 | CEO | > £25000 |
| Step 5 | – | Send confirmation email |
| Step 6 | – | Send PO to supplier |
The above example is a good approval process where you simply use the Net or Gross conditions on the steps. You can also apply a condition to the “send PO to supplier” step. Perhaps create a custom field of “Type” and only do Step 6 if the field value is “Purchase Order” as opposed to Amazon or Credit Card or Online.
Inclusive & Exclusive approvals
What do we mean by this? If you have 3 approval steps and the third step is for say the CEO, and she is only to approve if the value is over $100,000, then you would typically add a condition on the step of Gross Value > $100,000.
If you wanted to jump straight to that approver for a $100,000 approval, then that might be called exclusive – ie – we don’t care for the opinion of the approvers at steps 1 and 2. So to cut out the Steps 1 & 2, we would simply add an AND to their condition as shown below:
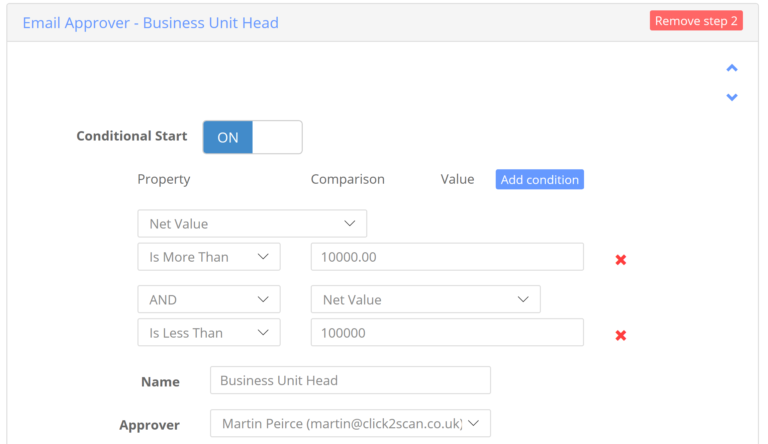
This step is evaluated and skipped if it returns false. The workflow then goes onto the next step in the process and evaluates that one. You could have a workflow with 10 steps and each one is evaluated as false. It would still succeed and reach the end of the workflow and be treated as complete. This means you should be able to achieve any outcome you desire.
Our advice is to try to keep the workflows to a minimum per Division, but be efficient with the steps and use all of the logic that’s available to you and build up your conditions to suit.
Invoice Approvals
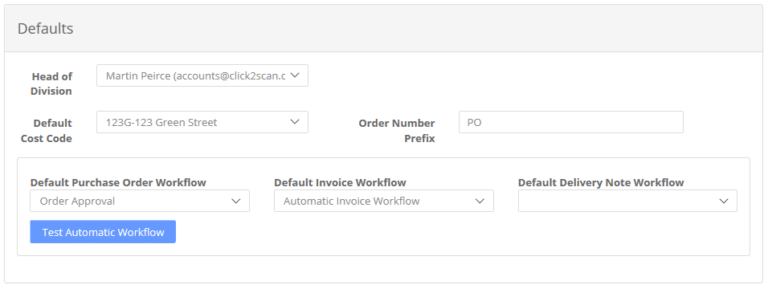
Invoice approvals can be different in that there are two distinct types – Order and No Order. Zahara can allow you to create two separate invoice approval processes. Each one would have a condition set at the top. Remember, if you use a condition to select the approval process, you need to set the default approval to Automatic.
“No order” Invoice approval
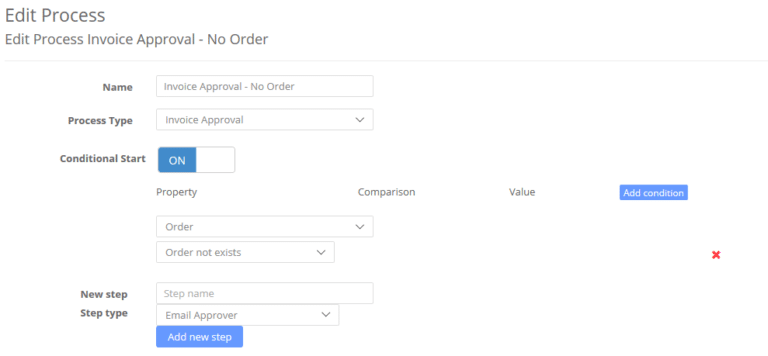
With the “No Order” approval, set the condition to Order – “Order Not Exists” as shown above.
You might then create an approval process for this Division that largely copies the approval from the Order, with the same approvers and thresholds.
“Order Invoice Difference” Approval
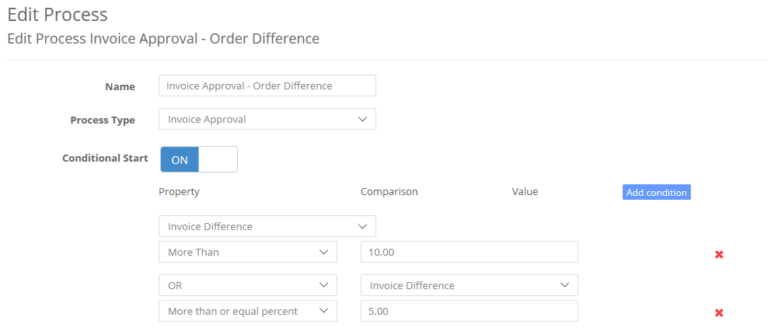
In the above example, the approval will only trigger if the Order invoice difference is Greater than £10 or more than 5% of the order value. This difference approval can mean that all invoices that match the order can be approved straight away and even exported into the accounts system as a step (Xero / QuickBooks Online / Sage Sync)
Ad Hoc Invoice Approvals
The approvals above are rules based. A new invoice lands in Zahara, it is evaluated for an approval process (based on its Division and any approvals set) and the choice of approval or approver is pre-set as the rules and logic kick in. This is the road to automation. You need to think of the rules you need now and possibly in the future if you are to work towards hands-free processing.
There comes a time though when you need to take over. The rules have worked but you need someone to take a look at an invoice as well. Make sure Ad Hoc invoice approvals are enabled in your business settings. (Business > Settings > Workflows) - You can then select an approver from a list and choose the outcome of the approval.
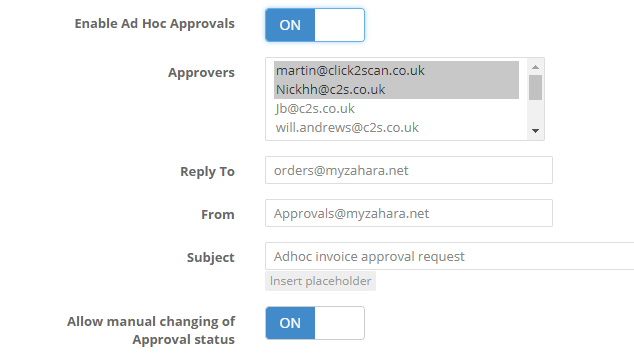
You will then see the extra settings. Multiple select your finance users from the list that can use this feature and send invoices out for approval. Set the “Reply To” address – perhaps this will be the email address for the finance team or a particular user in finance. Set the from address, as per your SMTP settings – so if you use Zahara’s SMTP make sure this is an @myzahara.net email address.
Then set the subject for your Ad Hoc invoice approvals - Save your settings
Using Ad Hoc Approvals
Using Ad Hoc approvals is very easy. From your invoice, click the people icon as shown below. Choose an approver and determine the outcome if it’s approved.
Treat as Complete – If you send an invoice to Tony for approval and he approves it- is that the end of it or are you wanting to send it on to other people afterwards? Perhaps there are multiple lines to approve. “Treat as complete” means that if Tony approves it, and you set it as “Treat as complete” then you will see the Green approve icon. If however, you don’t tick this, you will see a flashing orange icon. The flashing icon means its been actioned so you now need to look at it.
Sending for approval
Firstly, click into your invoice by clicking the invoice number. You will now see this new icon …
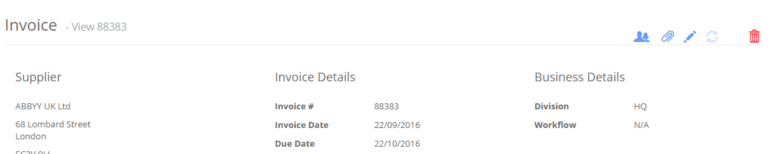
Click the people icon …
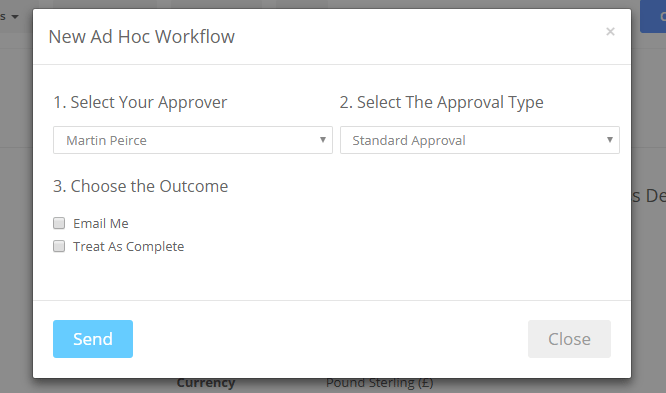
- Select your approver – just the approver you want.
- Select the approval type – standard, Must Edit or Can Edit
- Select the outcome – Email Me – will email you the outcome, Treat as complete – see above
- Click Send
Now the approver will receive the approval email, the history will be updated and the icon will stay orange until actioned.
Finalising the approval
If you didn’t click “Treat as Complete” you can manually change the invoice status to Green when you are happy that the invoice has been approved. 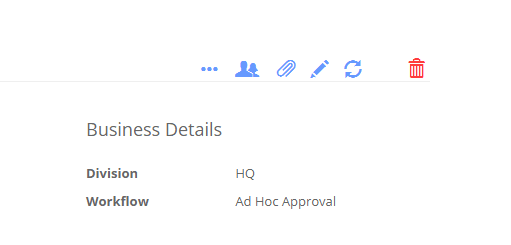
Approval Email Templates
The wording of your Emails including the approval email is edited in the Approval template as shown below. You access this under the Business > Settings menu.
You can change the wording and drop in any placeholders you need from the Insert menu.
The Approve and Reject buttons are preset and styled to work with both Outlook and the rest of the mail systems like Gmail / Office 365 that support later versions of HTML and CSS. You can also display line items inside the email - to show the approver the breakdown of the order or invoice.
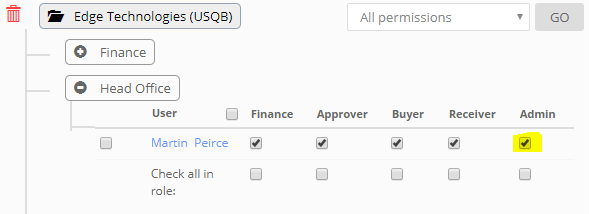
Choosing Workflows from the List
By default, the user wouldn't choose a workflow. They will have the approval process pre-set for them. However, by providing them with the Admin role, the approval list will be accessible. If you want the users to be able to choose a workflow from the drop-down list, they have to have the Admin role.
So to get tothis…
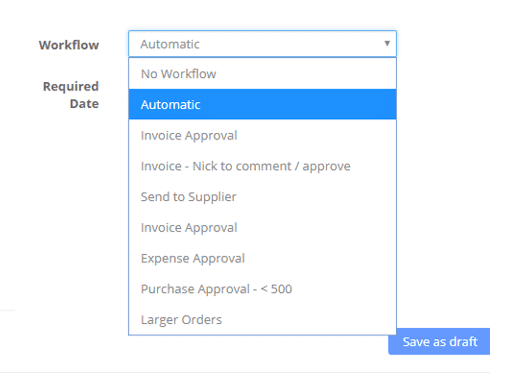
They need this …
Default workflows Explained
Group Approvals
With approvals you usually want somebody to take ownership and to take action. Group Approvals are for those who have a team of people where anyone in the team can approve. Perhaps it's a project team or a flat authority. You can create a workflow step where you select “Group Approval”. This means you can send an approval to a group of people and choose how to allocate it in the group.
The options are:
- “Broadcast” – everyone gets the approval email and the first one to approve does the approval. This is literally “Broadcast” to everyone in the group.
- “Round Robin” – which means we send in an order. So if you have Bob, Dave & Sue in the Group, the order would be Bob to get the first one, then Dave to get the second approval request and Sue to get the third one. Bob would then get the fourth one and so on.
- “Dynamic” – This is where we take into account who is the fastest approver, who is actually working and not set on absence, and who has the least approvals to do. We created an intelligent algorithm to decide the best person to approve it in the group.
Time-Outs
There are handlers in the Group approval for things like everybody being off and anything to avoid a perpetual loop. In one of these circumstances, we will fail the approval and leave you with a warning so you can take action.
Absence & delegation
If you are an approver and you will be away for an extended period of time, you or your tenancy admins can set a delegate to under-take the approvals while you are away. Once set, the delegate will receive approval notifications instead of you.
To set your own absence settings, look for the help icon and on the drop down list choose Absence Settings.
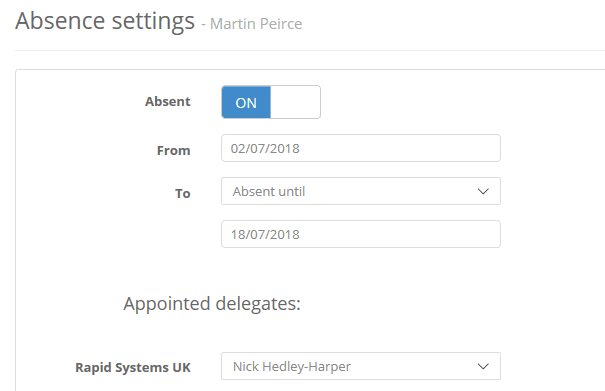
Firstly, enable the absence and set the dates you are away.
For every Business Unit you belong to, you have the option of setting the delegate. A delegate will only appear in the dropdown list if they are designated an approver – they have the approval role. If they don’t appear, the tenancy admin needs to provide them with similar roles and permissions to you.
Once you are all set, click Save at the bottom.
If your approver goes on Safari for three months and forgets to set his delegate, fear not. You can set this yourself. Head into the user settings in Admin >Settings. Find the user in the list and click their name. You will then see the following:
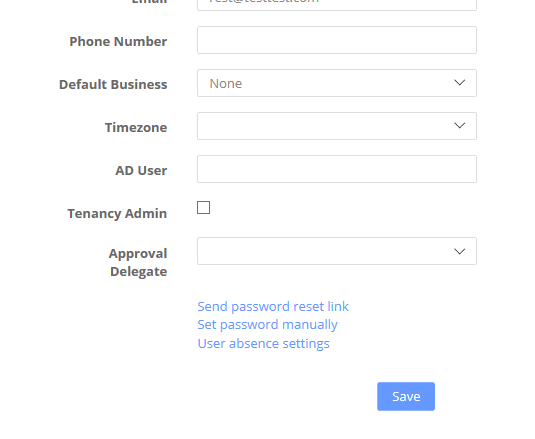
Click the link at the bottom – “User Absence Settings” and set the approval delegate for them.
Approval Delegate
With this feature we are answering the question “Can I stop someone approving their own purchases”. Example, you want to prevent the CEO from raising a purchase request for $500K and approving it themselves. To do this you enable the feature in Business >Settings >Workflow
“Originator cannot approve own orders”
Then for each user, you set their Approval Delegate in their user settings. Perhaps for the CEO you set the CFO. To do this, edit the users settings and choose the delegate from the drop-down list where you see the words “Approval Delegate” as shown below.
This means, very simply, when set, Zahara will bypass the originator in the approval list and go onto the next approver. If our person here is the last approver in the workflow, we will use the delegate instead.
Sending the Purchase Order to The Supplier
- Send as a workflow step
- Send from within the order using the send email icon
- Download a copy of the PO and send it yourself
1 & 2 above have an audit trail behind them and the ability to have links in the email that ask the supplier to accept or reject the order so these are our suggested methods. A typical process though is where you want to let the buyer know that the order is approved and that they can send the PO off themselves. There is no way to send a copy of the PO to the buyer in an email. You can send the buyer an email and provide a link to the order. This would be achieved by adding a “send email” step to your workflow. You can provide as much information as you like about the Order using the placeholders and the links.
Our advice
The best solution is to add a “send purchase order to supplier” step at the end of your purchase order approval. This step has the ability to “CC Originator” – this is in effect what you want to do.This method gives you a good audit-trail and shows you if the order was accepted by the supplier (add the relevant placeholder to your supplier email template). Just make sure your suppliers email addresses are all up to date.
Automatic Invoice Export
Export to FileDirector
Secure Approval Requirement
Mandatory Approval Comments
Approval Reminder Email
Approving - Being an Approver
Preventing the Approval Email
Troubleshooting
The workflows doesn't engage or trigger
All the workflow steps are skipped
The wrong workflow is used
Related Articles
30 Minute Setup Guide
Overview This guide is for those taking a trial and wanting to hit the ground running. Menus The Business menu is where you configure and setup your business The Admin menu is for creating new Businesses (Business Units) and for managing your users ...Approvals Videos - Tutorials
Invoice approvals: setting up approvals Approvals in actionAdhoc invoice approvals
What are Ad Hoc Approvals? In Zahara you can create as many pre-determined Approval processes as you need – for purchases and for invoices. These rely on logic to determine who the approver is or indeed if the Purchase or Invoice needs to go for ...Invoice Coding Approvals
There are times when you need your approvers to also code an invoice. Coding can include the Account code (ledger / nominal), the Cost Code or the Project code. You can create an approval set that requests / demands the user takes action. Edit your ...Selecting workflows from a list
By default, the user wouldn't choose a workflow. They will have the approval process pre-set for them. However, by providing them with the Admin role, the approval list will be accessible. If you want the users to be able to choose a workflow from ...