Nominal Codes
Business > Nominal Codes
Often referred to a Ledger codes or Account codes, Nominal codes are the same thing to Zahara. This is an accounting term, to allocate your spend to the correct coding.
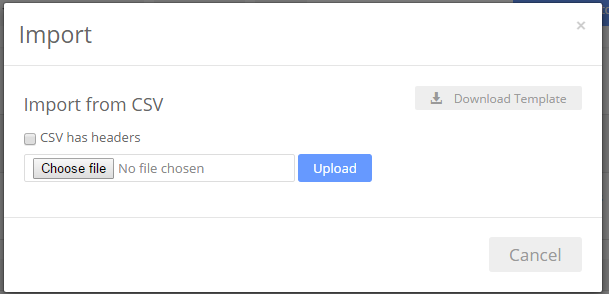
Importing
The first thing you might want to do is import your ledger codes. This should be straight forward. Click “Import Nominal Codes” and download our template. There are only two fields to populate – code and description.
Top tip – Before you get carried away and import your whole chart of accounts, just remember, this is a purchase system so you can strip out any sales codes, journal codes / asset / liability codes that are never used in purchasing. We suggest you stick to expense codes.
Once you are ready, save your CSV file, browse to it and import it.
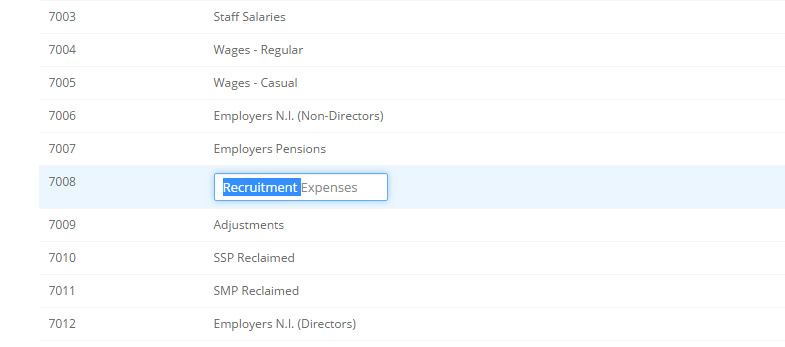
Editing Nominals Codes
You can edit a nominal code – just double click into the description or the code to edit it. There is no save button.
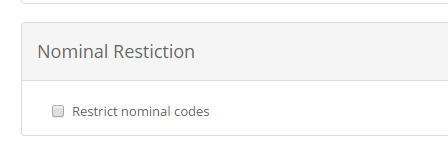
Restricting Nominal Codes
Although your nominal codes belong to your Business Unit, you can restrict which codes your Divisions can use. This can be done in the Division settings.
Click to enable Restrictions
Once enabled, you can choose the Nominal codes that this Division can use.
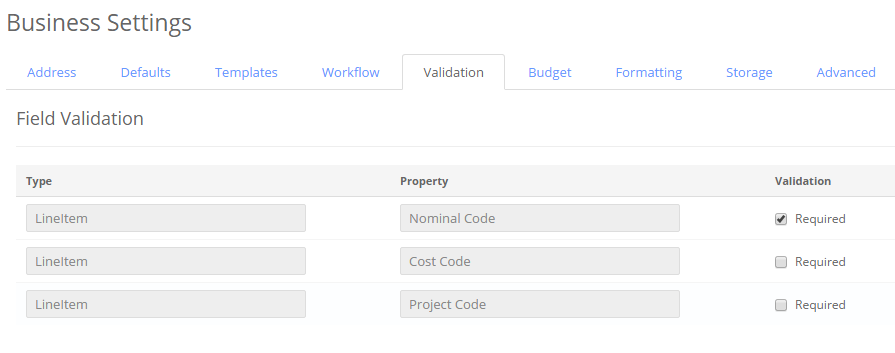
Make nominal code compulsory
You can insist that your users have to choose a nominal code in each Line Item of their order. You can also allow them to leave it blank. This “Validation” is available under the Business > Settings menu. All you need to do is tick the relevant box and save the changes.
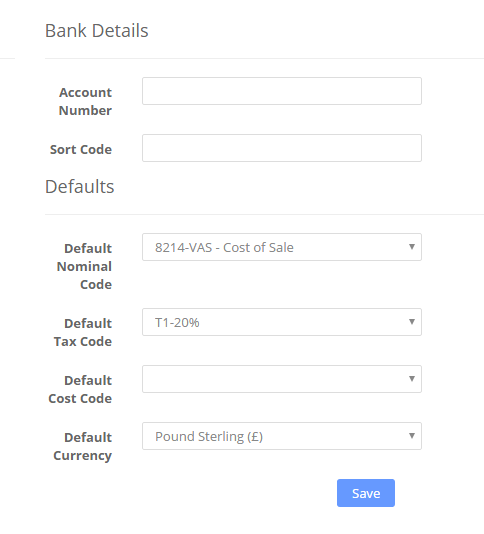
Supplier Default Nominal Code
One of the fastest ways to populate an order is to set Defaults per supplier. This means once a Supplier is chosen, the default nominal code can be populated. You can edit any of your suppliers to add a default nominal code.
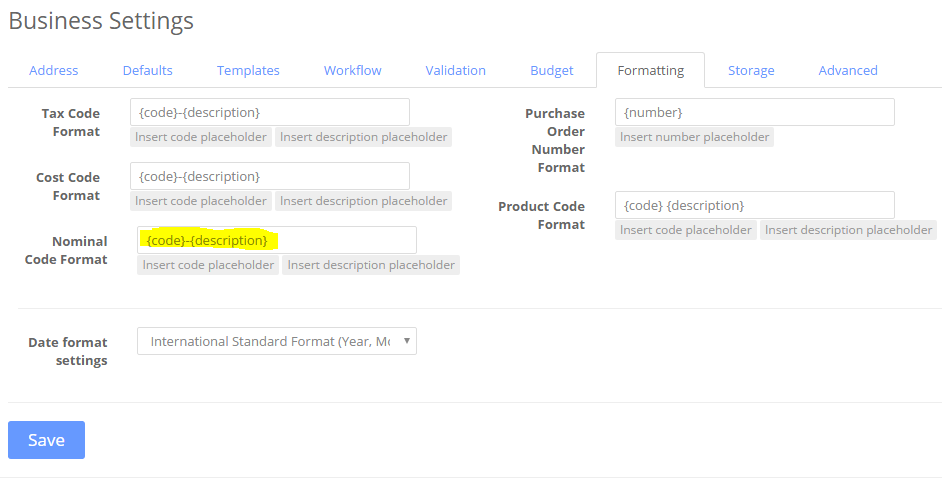
Displaying Your Nominal Code
You also have the choice of how your nominal code is displayed in your drop down lists. You can have just the CODE or the CODE & DESCRIPTION or perhaps just the DESCRIPTION.
You can set this in your Business Settings and then edit the placeholders on the Formatting tab.
Related Articles
Cost Codes
Business > Cost Codes Cost codes are totally arbitrary but allow you to further allocate your spend. You have your ledger code – say “5050 – Stationary” but in addition you could have cost codes for Paper, Pens, Envelopes, etc. You can create what ...Tax Codes
Business > Tax Codes If you reclaim back your expenditure Taxes you may want to setup tax codes. We allow for as many Tax rates or Tax codes to be created as required. If you don’t reclaim your tax, you may want to set one code of Zero, with a 0% ...Currency Codes
Currency Codes All of the currencies that Zahara can work with have a three character code. A full list of these currencies and their associated code can be found below. Pound Sterling (GBP) Euro (EUR) US Dollar (USD) Indian Rupee (INR) South Africa ...Project Nominal Restrictions
Project Nominal Restrictions If you create a Project, you can specify which Nominal codes (GL Codes / Account Codes) a buyer can choose from. Firstly, when editing the project, switch the Nominal restriction to On. If you have already set a budget ...Bulk importing of orders
You can bulk import orders from a CSV file. Go to the Documents > Purchases pages and select import. Now download the CSV template. The process is very easy, provided you know how to populate the order CSV file. A copy is shown below. Line# Each ...